The CamBuddy Pro was a little overwhelming at first. Joopic pitches it as this wonder device that can do practically anything – an image transfer-tethered live view-intervalometer-remote shutter release-sound, light, and laser sensor-multi camera synchronization device. But once we started putting it to use, it was easy to get up to speed and understand what a photographer can do with one of these in their gear bag.
So read on to find out what we thought of the CamBuddy Pro DSLR Smart Controller:
(Disclaimer: Shutters in the Night was provided a beta version of the CamBuddy Pro by Joopic to test out.)
Setup: Cables and Pairing
The CamBuddy works with practically all recent Canon and Nikon DSLRs. To get full functionality, you need to connect both a USB data cable and a shutter release cable from the CamBuddy to your DSLR. Having two sets of cables dangling off the side of your camera can look a little clunky, but both are there for good reasons. The two other ports on the CamBuddy are a Micro USB port for charging (Joopic claims 2-3 hours for a full charge, providing 4 hours of battery life), and a flash trigger port.

Once connected to your camera, the CamBuddy needs to be paired with a smartphone using the CamBuddy’s WiFi network, so it can be controlled through the Joopic app (available for iOS and Android).
Basic Use: Shoot and Push, and Remote Shooting
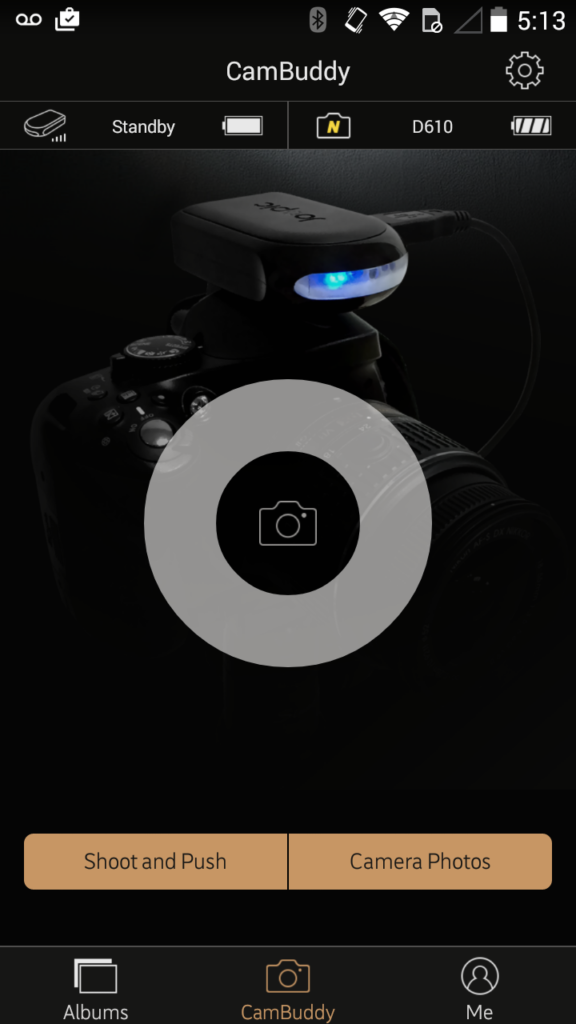
This is the main screen of the Joopic app:
Tap on the camera icon in the center of the screen to reveal all the modes:
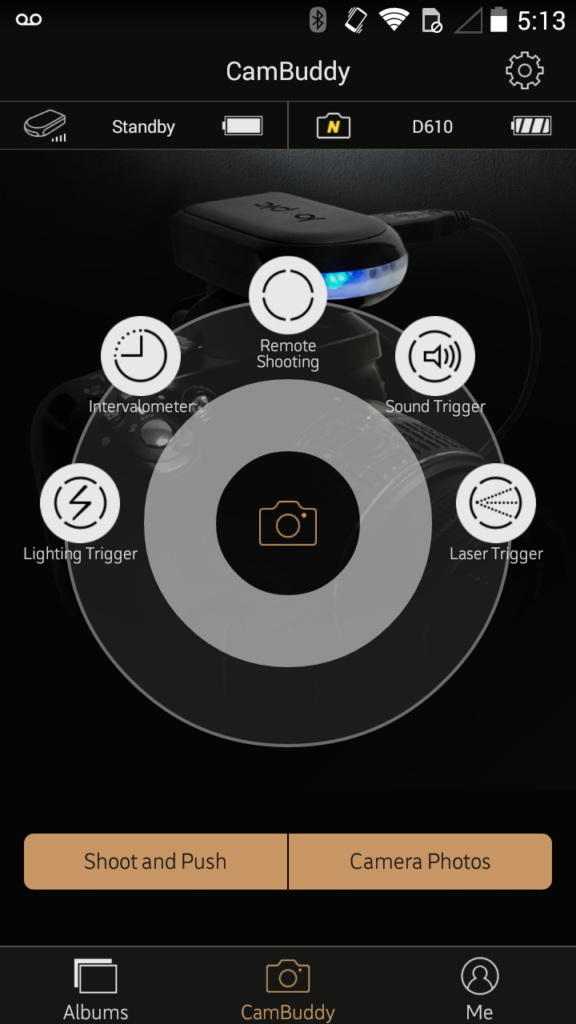
The two modes for taking basic photos are Shoot and Push, and Remote Shooting. The main difference between them is that in Shoot and Push, you use your camera as normal and photos get transferred to your phone via the CamBuddy as you take them, while in Remote Shooting, the DSLR is controlled from the phone – there’s a live view feed and you set focus, aperture, shutter speed, ISO, etc. on your smartphone screen. Let’s look at Shoot and Push first.
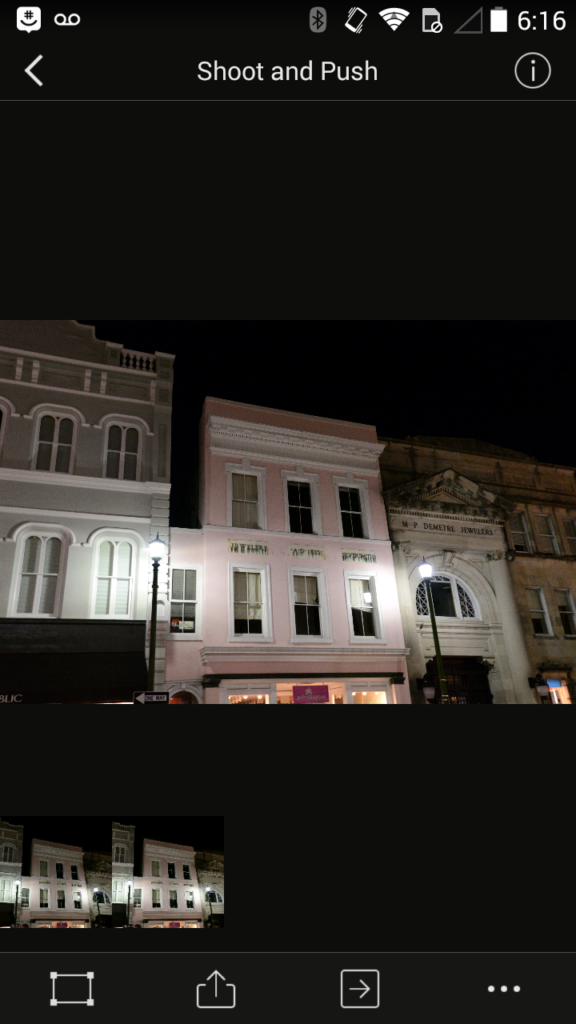
The initial Shoot and Push screen is a little cryptic, with no instructions or words whatsoever. Once you take a photo with your camera, though, it shows up on the screen and there’s a few things you can do with it by tapping different icons on the Shoot and Push screen:
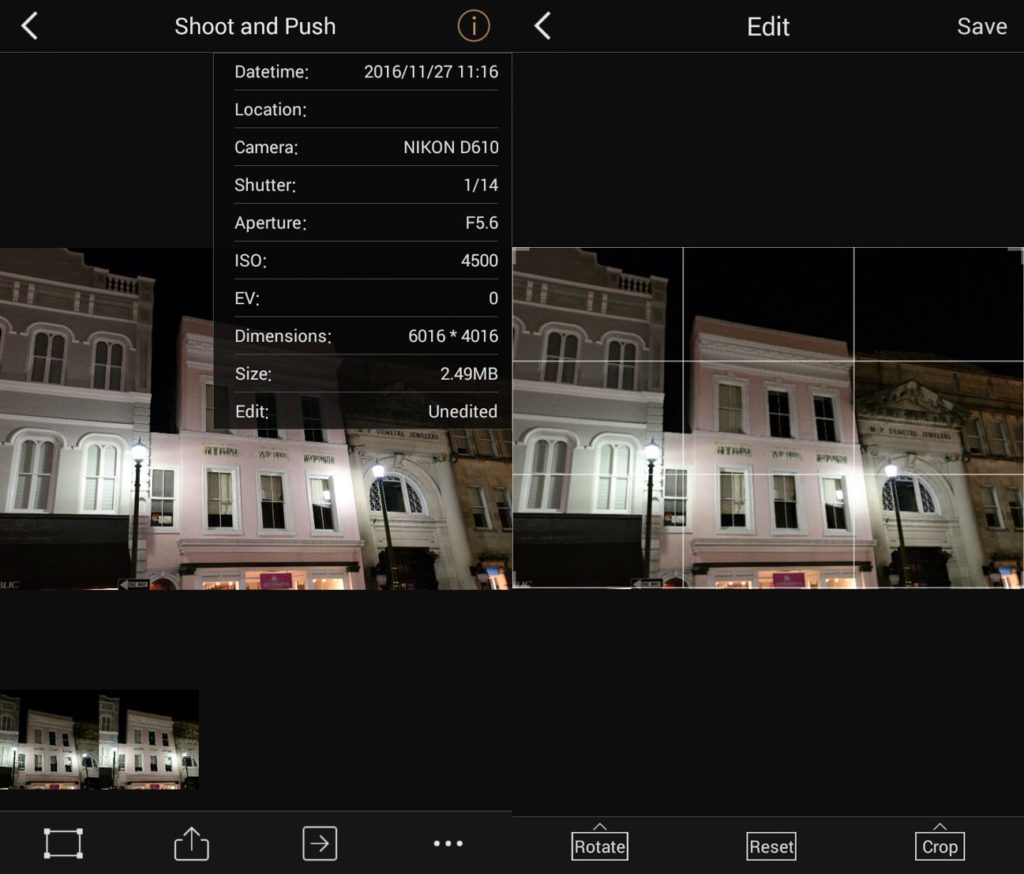
(L) Read its EXIF info, and (R) Crop and/or rotate it:
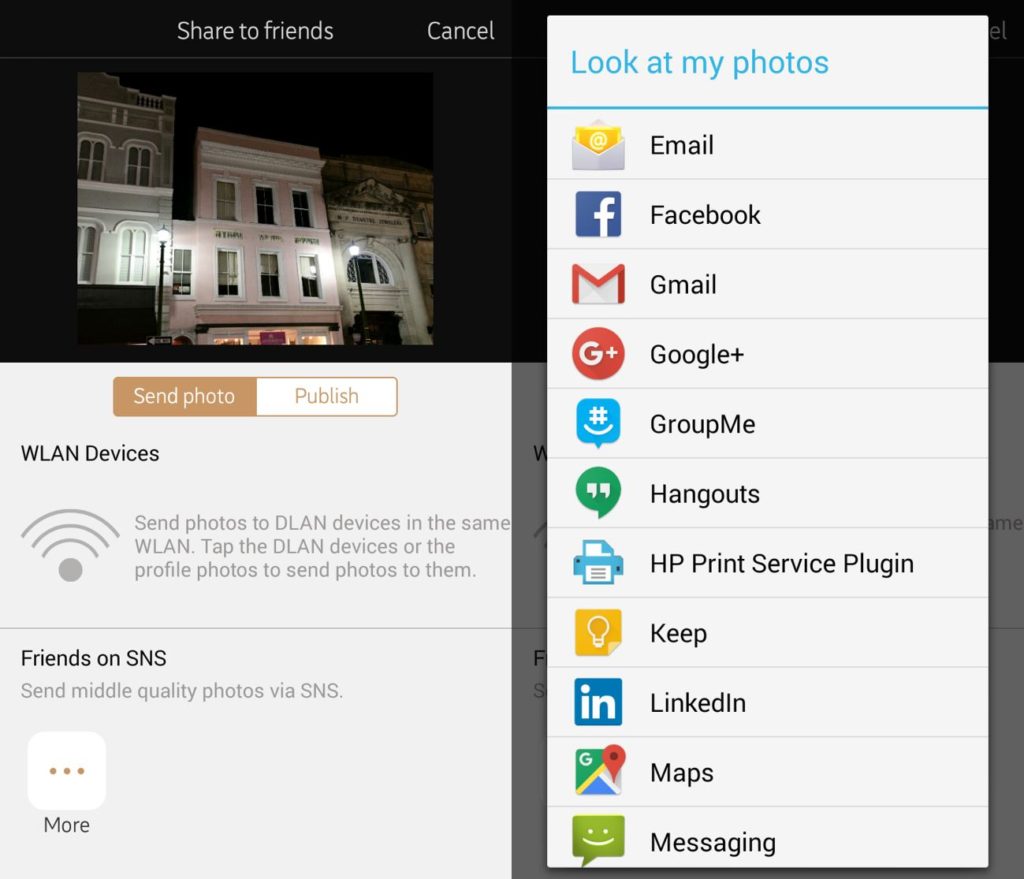
Directly share it:
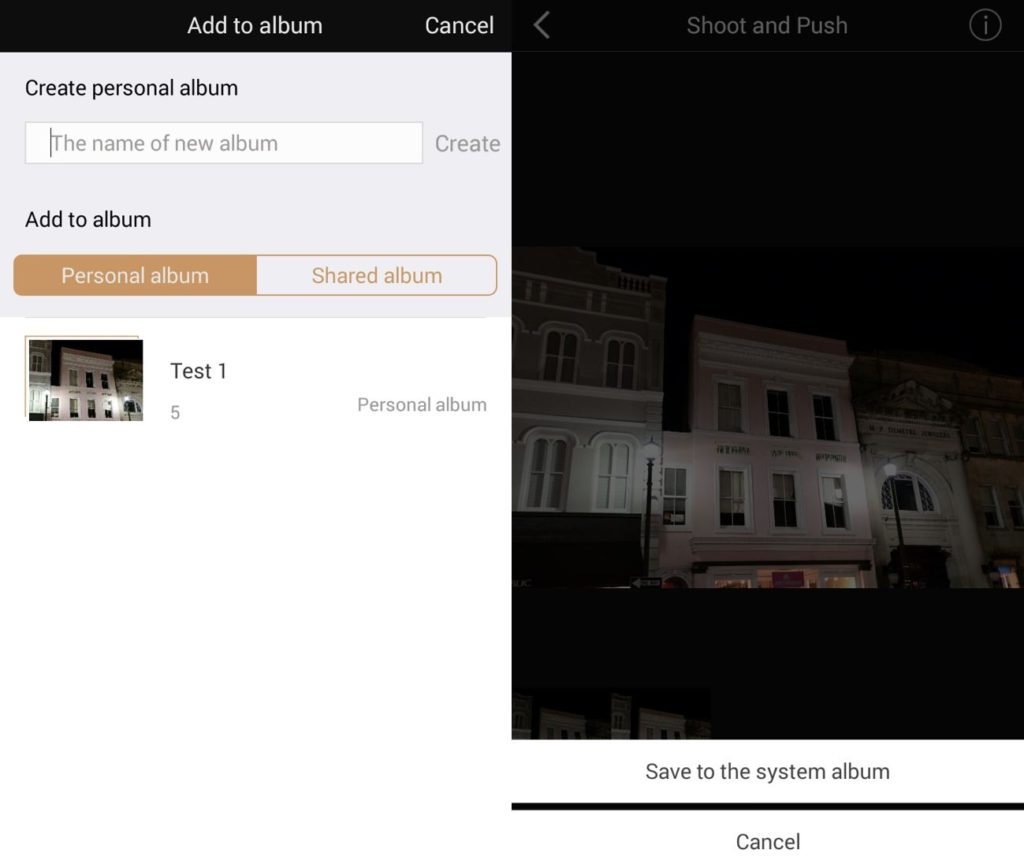
Or save it to an album on your phone:
Remote Shooting takes things one step further. Since the camera is controlled from the smartphone in Remote Shooting, the interface gets a little busier: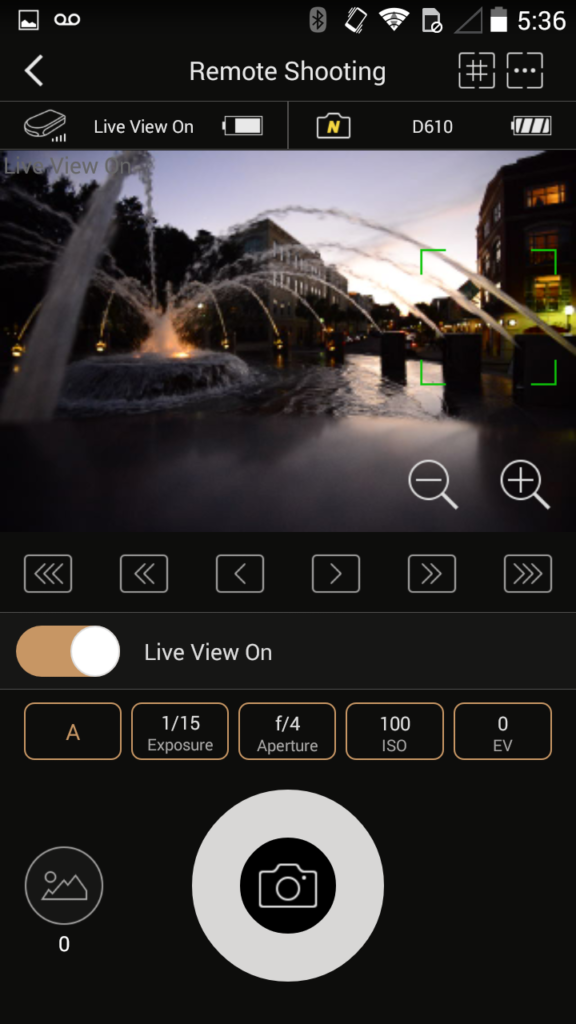
There’s a lot going on here, but much of it should be familiar if you’ve spent a meaningful amount of time with a DSLR. Starting from the bottom, the large, round camera icon functions as a shutter release, and the icon to its left is for accessing files in the camera’s SD card. Above that is the exposure mode (“M” showing for Manual) and exposure settings. Then, a switch to turn live view on or off. Above that, arrow keys for adjusting focus in different increments. On the live view feed, you can tap to move the focus box (shown as red borders) and engage autofocus, and/or use the magnification buttons in the bottom right corner to zoom in and fine-tune the focus using the aforementioned arrow keys.
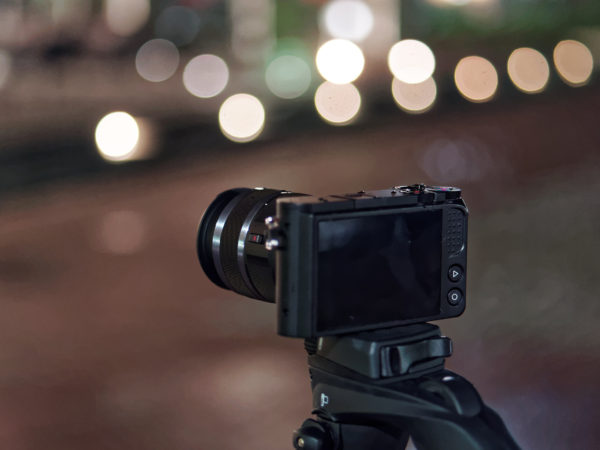
Using Remote Shooting was much more reliable than using Shoot and Push (we never experienced any freezing/crashing in this mode), and, quite frankly, way cooler as well – there’s a clear cool factor around having a live feed from your camera show up on your phone, and watching the focus dial on your lens move(!) as you tap the manual focus buttons (Joopic is currently working on implementing automated focus stacking as an additional feature, too). Remote Shooting opens up a lot of creative options, like self-portraits — this one was taken by setting the camera on a tripod, and walking in front of it while looking at the live view feed from the CamBuddy to position yourself:

In Remote Shooting (and all other modes besides Shoot and Push), photos aren’t automatically transferred to your phone. Instead, you need to access your camera’s SD card through the app and transfer the photos over from there. At that point, you have all the same options (cropping, sharing, reading EXIF info, etc.) as in the Shoot and Push mode.
Other Features: Intervalometer
We’re guessing the intervalometer is the real reason a lot of people are interested in this device. The truth is, timelapses are awesome, and there’s no getting around that fact. Here’s what the CamBuddy offers in intervalometer mode:
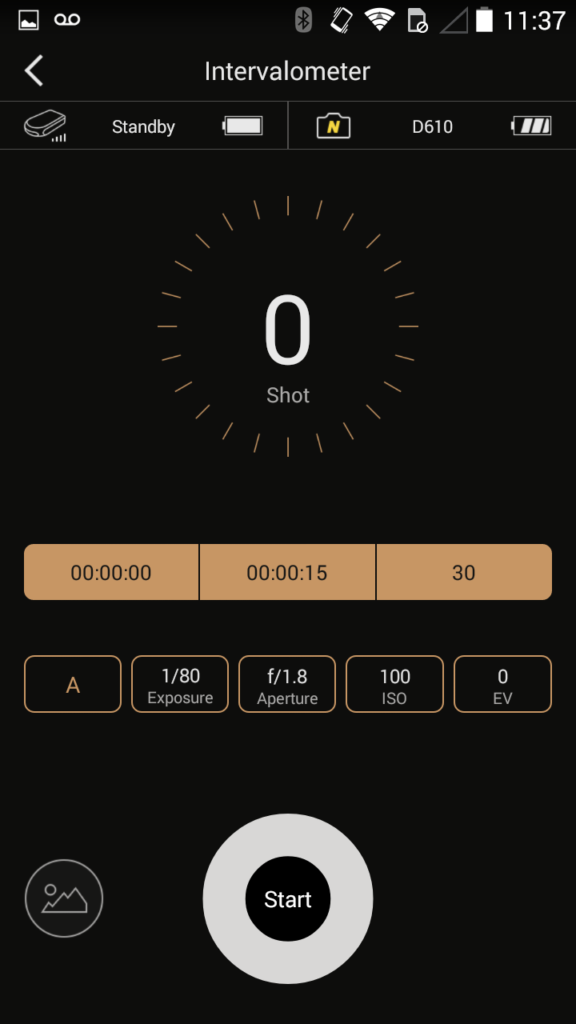
The bottom 1/3 of the screen is practically identical to the Remote Shooting screen, but above that are the intervalometer controls. There’s only three, from left to right: the Delay (how long to wait before taking the first photo), the Interval (how long to wait in between each photo), and the Duration (how many photos to take, or how long to take photos for). To use the intervalometer, simply put in your delay, interval, and duration, and hit Start. Here’s a short sample timelapse controlled with the CamBuddy’s intervalometer:
Other Features: Sensor-triggered Shooting
The rest of those bubbles on the main screen are for various sensor-triggered shooting modes: light triggered, sound triggered, and laser triggered (with an optional laser generator package). Here’s the sound trigger mode, as an example:
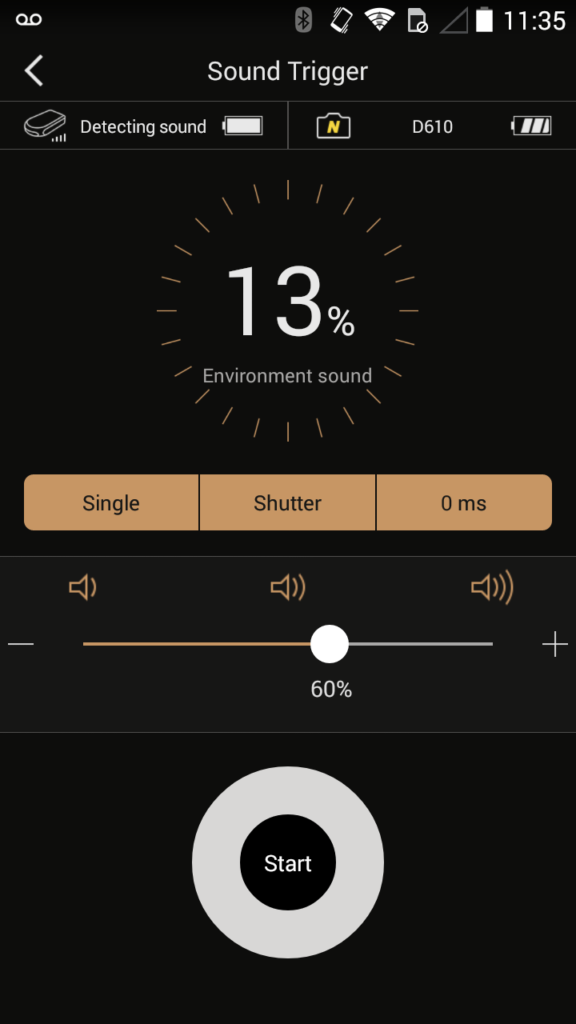
Basically, you set the threshold of sound level that should trigger the camera, in percent, as well as whether the camera should take a single shot or a burst, whether the shutter and/or flash should be triggered, and the delay (in milliseconds). This mode lets you do things like clap to take a photo, capture high speed photography of objects hitting other objects, and more.
Conclusion
The device can do a lot, but it’s features were more accessible than anticipated. Joopic’s website and their crowdfunding campaign pages present the device in an overwhelming way. Chances are, this review unintentionally does the same thing. Once the device is in your hands, though, it’s far easier to understand. CamBuddy isn’t perfect by any means — most notably, we wished the app was more reliable/stable, and wonder if there’s any way to cut down photo transfer times (currently ~3-5 seconds per photo and highly dependent on unpredictable signal quality). Also, 4 hours of battery life seems a bit low, and is a no-go for serious timelapse use or all-day shooting. Thankfully, since charging is over Micro USB, an external battery pack (like for smartphones) can also top off the CamBuddy’s battery.
So what are the most compelling reasons to get a CamBuddy? For one, if you’re a heavy smartphone user, it’s a simple way to get your DSLR photos onto your phone on-the-fly, where you can quickly share or publish without needing to pull out a computer and find WiFi. Also, if you’re interested in another feature for creative reasons — for example, the light trigger if you’re planning to do storm photography — the CamBuddy can grant you that capability. Finally, if you’re a frequent tripod user, we found using Remote Shooting to be easier and more comfortable than controlling the camera directly, especially when at weird heights or angles.
Joopic completed a successful (over 2000% funded) Kickstarter campaign for the CamBuddy in November 2016, and now you can preorder from their Indiegogo campaign for $129 (silver) or $139 (black). Eventually, Joopic plans to sell the CamBuddy on Amazon. Our take is that at the preorder price, if you already have plans for how you’ll use the CamBuddy you should definitely go for it — it’s a uniquely fun and useful device for $129. But it’s a tougher sell at the regular price, which is a little higher than we would’ve guessed, unless you know you’ll regularly need it for something. At that price, a more polished app and faster performance would make the deal a lot more enticing.